|
|
How to wire Umnitza
DDE's to a switch
I rewired my DDE's after installation as switchable daytime running
lights. I got annoyed that when my lights were wired up to the parking
lights, I couldn't run them on overcast and rainy days without turning
on my parking lights and gauges. Turning on the lights and gauges
during the day made them very difficult to read. I considered just
wiring my DDE's to a switched power source that would turn them
on when the car was on, but I didn't always want them on during
the day - just on overcast days when they'd actually be noticeable.
Plus, I didn't want to lose the delay after the car is turned off
- Hey, when else can I enjoy the look of the DDE's but when I'm
walking away!?
| |
|
| |
Did this help you out? Feel free to throw us a bone to help keep housecor's how-to's hosted!
|
| |
|
So the switch is the solution to the best of both worlds.
When the switch is "on": The DDE's come
on when the car is on and shut off when the ignition is turned off.
The DDE's are on whenever the ignition is in the on position.
When the switch is "off": The DDE's come
on only when the parking lights or headlights are turned on. Just
like the headlights, the DDE's remain on after the car is turned
off for a few seconds when the stalk is set to "auto".
tools/Supplies:
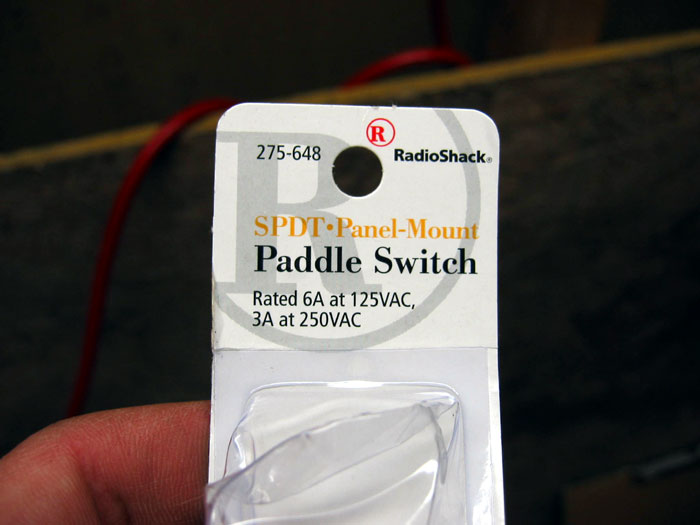
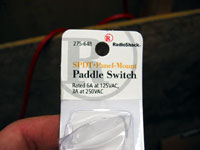
- SPDT switch (single pole dual throw) - Available @ Radioshack
- Around 25 feet of 22 gauge (or thicker) wire
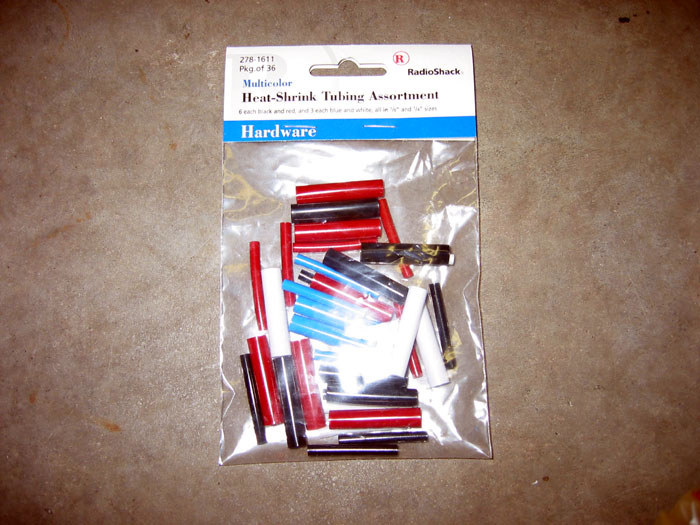
- Heat-shrink tubing - Available @ Radioshack

- Heat gun, lighter, or matches
- 3 slide connectors
- Drill
- Drill bits
- Wire strippers
- Crimper (typically part of wire stripper)
- Coat hanger
- Electrical tape
- 3 quick splice
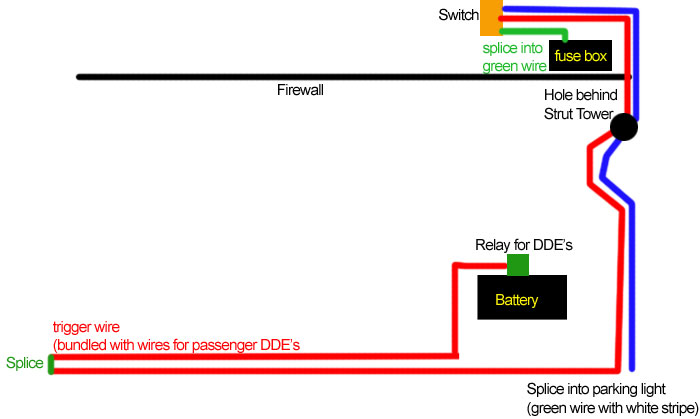
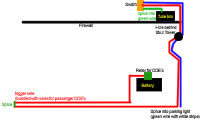
Wiring Diagram:
- Jack up the front driver's side of the car. This will allow
more room to work in the fender where the wires will be routed.
Remove the wheel to provide additional room to work if you prefer.
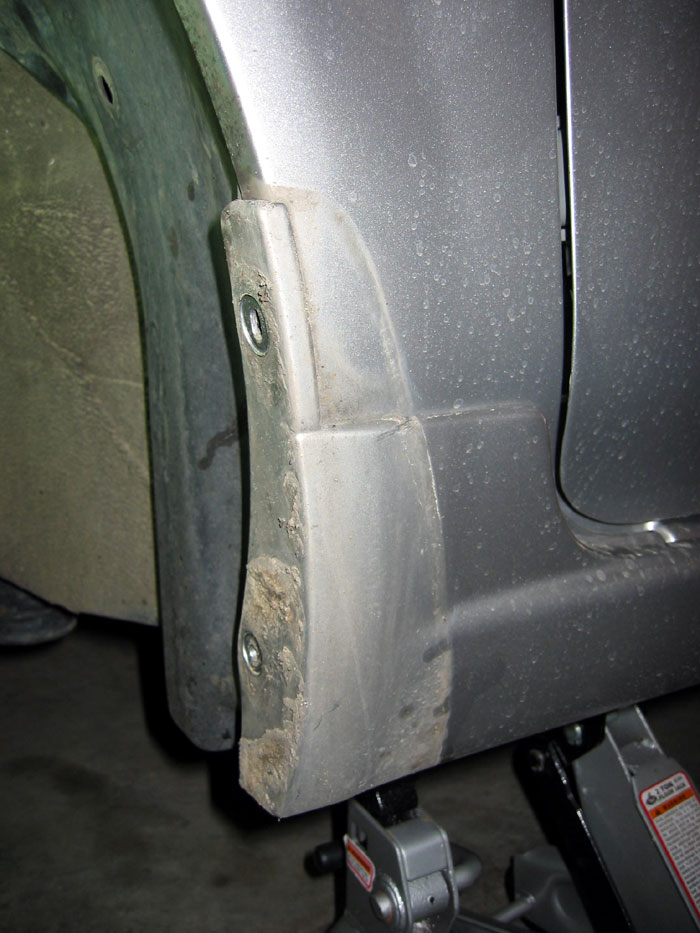
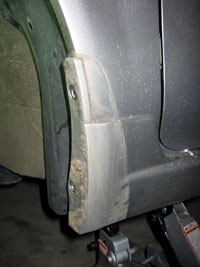
- Remove 3 bolts on the driver's side mud flap. There are two
in the wheel well and one on the bottom. When the flap is removed
you'll see plenty of built up dirt. A great opportunity to clean
up:
- Remove 3 pop tabs from inside the fender using a flathead screwdriver
to pop the tab. Pull the tabs out by hand or with pliers. One
is up top next to the spring.
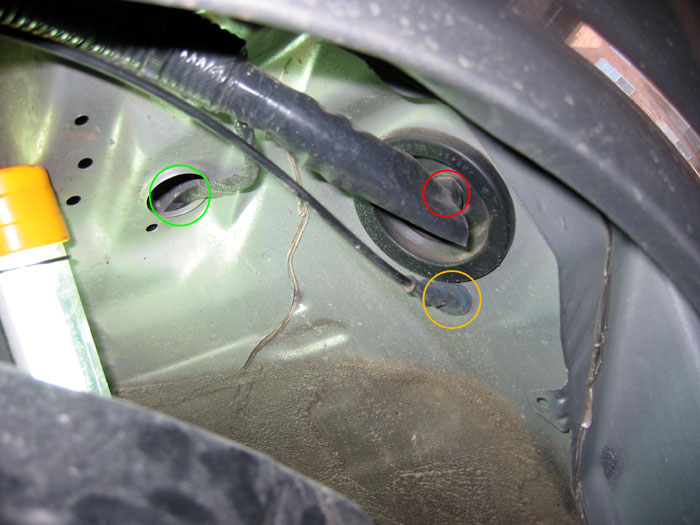
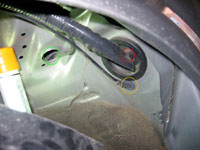
- Inside the wheel well, pull the plastic fender guard back toward
front wheel to allow access to the wiring. Both grommets running
wiring into the cabin are visible. They are circled in red and
orange. Pull the grommet circled in orange back. This is where
the trigger wire will be routed.
- Using 22 gauge (or thicker) wire, cut two wires of different
lengths:
- One wire should be long enough to run from the in cabin switch
to the passenger side headlight (the red wire in the diagram)
- The second wire should be long enough to run from the in cabin
switch to the driver's side headlight and splice into the parking
light wire (the blue wire in the diagram)
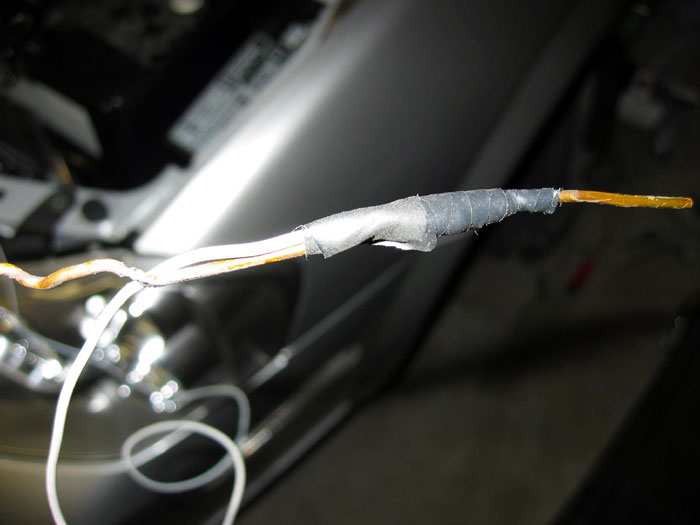
- Back inside the interior, run the two wires from step #5 through
the hole circled in red below. To find the hole, just follow the
hood release cable. To make routing the wires easy, tape the two
wires onto a straightened coat hanger. Be sure to leave enough
wire in the car to reach the switch. The wires will exit in the
fender where the grommet was removed in step #4. The hanger should
slide through the hole and exit out of the fender with minimal
pressure.

- Route the 2 wires now in the fender up through the hole circled
in green in step #4.
- Route one wire to the driver's side headlight and splice into
the green wire with a white stripe on the parking light. Route
the second wire to the passenger's side headlight and splice into
the red trigger wire bundled with the DDE wiring. Be sure to secure
the wires using the ties provided with the DDE's.
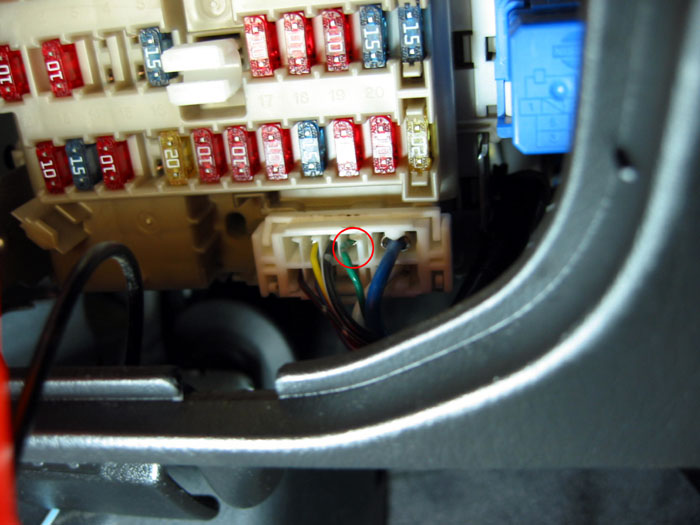
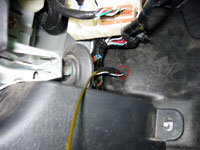
- Splice a 22 gauge (or larger) wire into a switched 12V power
source. I got out the multimeter and after a little hunting found
the green wire below in the fuse box below the steering wheel.
Tap the green wire circled in red
with a quick splice. Be sure the wire is long enough to reach
from the fuse box to the switch.

- Remove two screws above gauges and pull the gauge cluster toward
you to release the retainer clips.
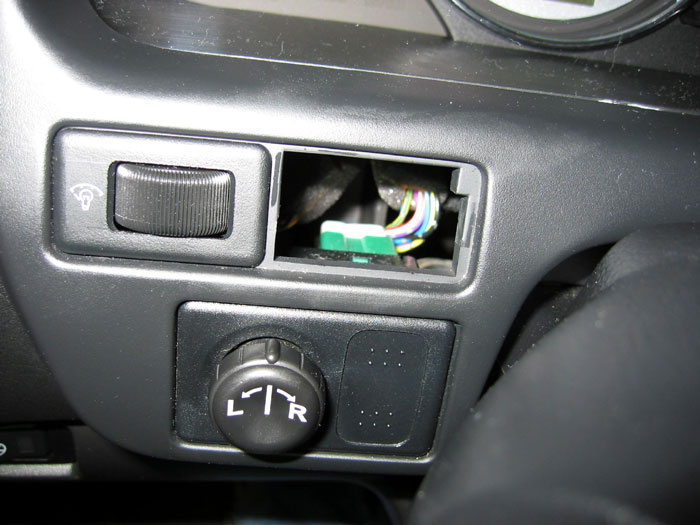
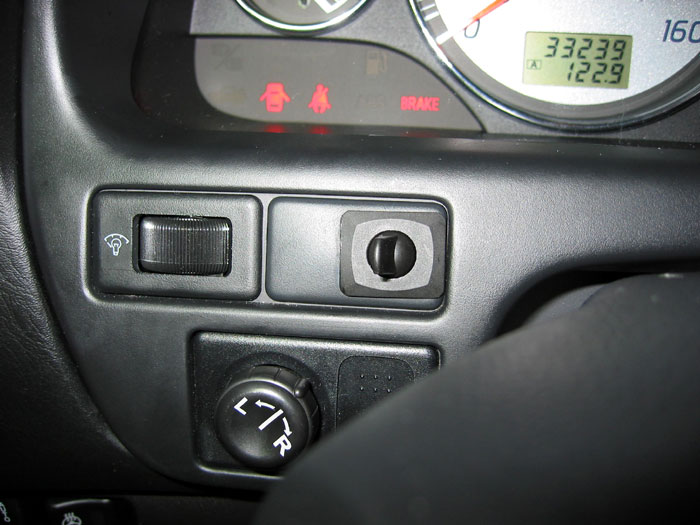
- Reach behind the dummy button next to the dimmer switch and
push toward you to pop the dummy button out:
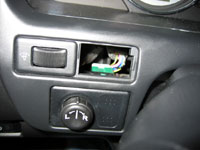
- Drill a hole in dummy button large enough to accept the switch
and insert switch. Take care not to screw this up. The dealer
charges 9 bucks for this little piece of plastic!
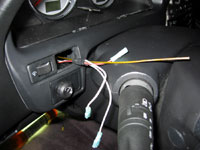
- Tape all 3 wires to the end of a straightened coat hanger.
(the two wires previously routed through the firewall and the
wire just connected to the green wire in the fuse box)
- Use the hanger to route the wires up through the dash and out
of the hole where the switch will be mounted
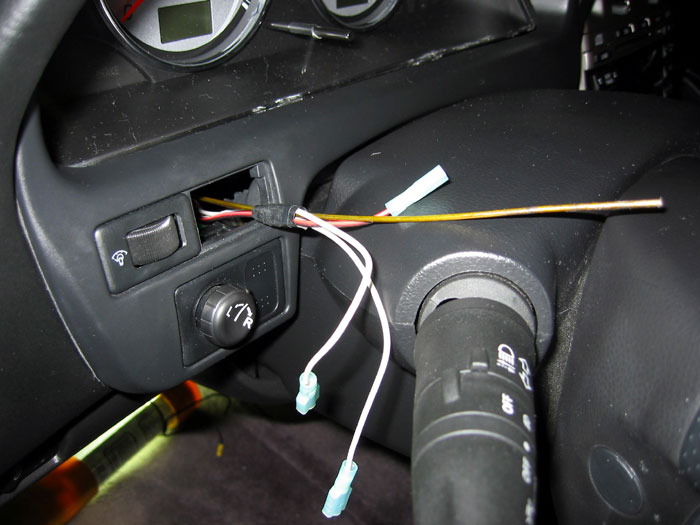
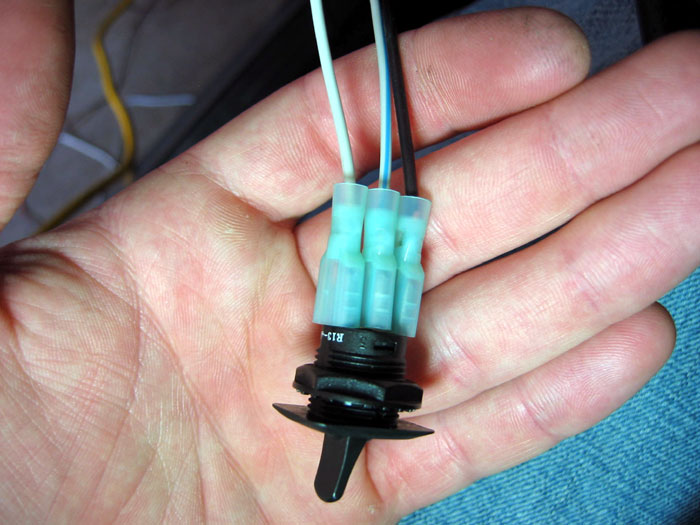
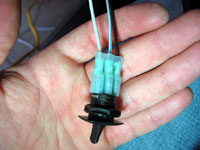
- Crimp slide connectors on the end of the 3 wires coming out
of the dash.
- Remove wires from hanger and connect the wires to the switch.
The middle wire is the input wire - in this case, the trigger
wire for the DDE's (shown in red on the diagram). The other 2
wires are connected to the parking light wire (shown in blue on
the diagram) and the switched 12V power source (shown in green
on the diagram).
- Check to confirm proper operation. When the switch is "on",
the DDE's should be on whenever the car is on. When the switch
is "off", the DDE's will only come on when the parking
lights or headlights are on. I put on and off in quotes because
there isn't an actual off setting for this SPDT switch.
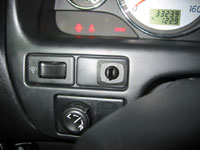
- Insert switch in dash. Admittedly, mine is a little crooked
- I rushed the mounting part since this switch is just temporary.
I plan to use a factory switch instead of the Radioshack switch
soon. I'll likely use a slightly modified heated seat button to
maintain the factory look.
As a further tweak, you could use a SPDT switch with an off selection
in the middle so the DDE's could be turned off even when the other
lights are on. Or if you prefer to simplify, you could use a SPST
switch that would just turn the DDE's on and off.
|
|
|
|
| |
Copyright
© 2003-2009. All rights reserved.
Instructions are for entertainment purposes only. Perform at your
own risk.
This site is in no way affiliated with Nissan North America, Inc.
Nissan, the Nissan Brand Symbol, "SHIFT_" tagline, and
Nissan Model Names are trademarks of Nissan North America, Inc.
|
|