|
|
|
How to change the fuel filter
According to Nissan the 5th Gen Maxima has a "lifetime" filter that never needs changed. In my opinion there is no such thing as a lifetime filter, so I changed mine recently. Many on maxima.org agree that a change is a good idea, and the general consensus is around 50-60k miles.
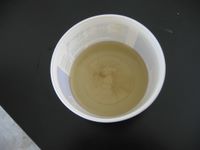
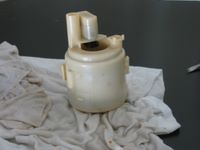
Here's proof there's no such thing as a lifetime filter.
This is gasoline I poured out of the filter before trashing it. As you can see, there is a large amount of particles.
I also cut open the used filter and found many surprisingly large pieces of metal embedded in the filter!

I originally thought this process looked intimidating but it's actually a pretty easy
job that shouldn't take more than an hour, and more likely closer to 30 minutes if you read this how-to first. NOTE: This how-to is for the '02-'03, but the process is nearly identical for the '01-'02. The biggest difference is the assembly has a different part number and looks a bit different on the '01-'02. Sprillis put together a great how-to for the '01-'02.
Tools/Supplies:
- Old towels to soak up gas
- 10mm socket & socket wrench or phillips screwdriver
- 8mm socket or phillips screwdriver
- Needle Nose pliers
- Small flat head
- Large pan or bowl (optional, to keep fuel from spilling on counter)
- 4 large nails
| |
|
| |
Did this help you out? Feel free to throw us a bone to help keep housecor's how-to's hosted!
|
| |
|
INSTRUCTIONS:
| 1. |
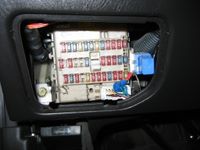
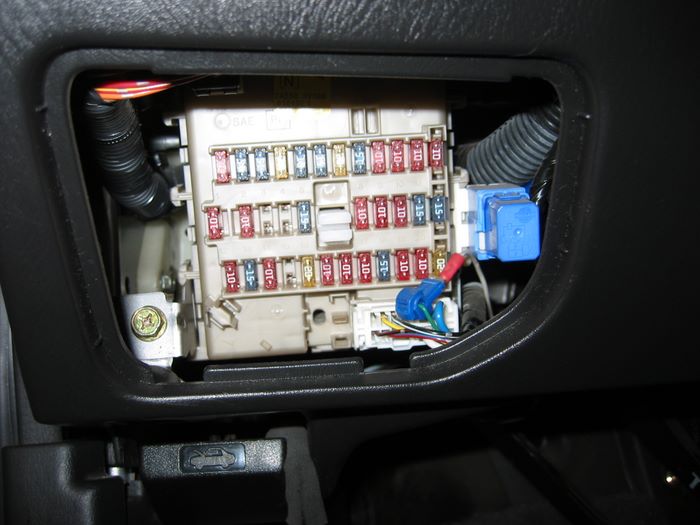
Remove the fuel pump fuse in fuse box under steering wheel. It's the blue 15amp fuse 4th from the right on the bottom row.
|
| |
|
| 2. |
Attempt to start the car to release fuel pressure. If it starts, let it run until it dies. Then try starting the car two more times letting it crank for a few seconds. This will release the pressure in the fuel lines. Also remove the fuel cap. This helps vent the tank. |
| |
|
| 3. |
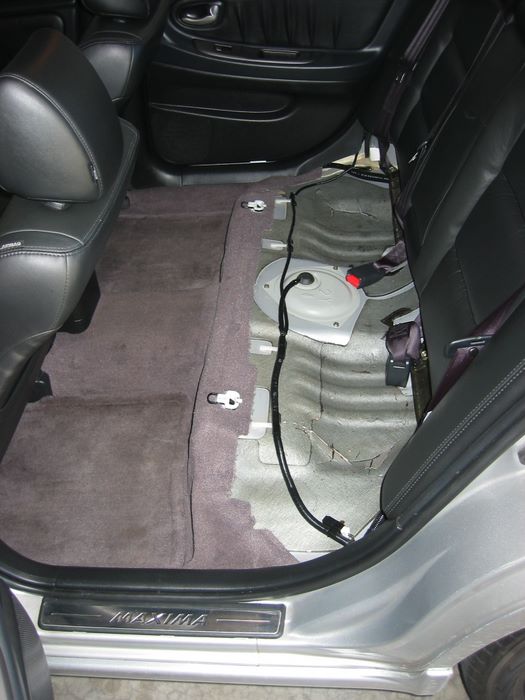
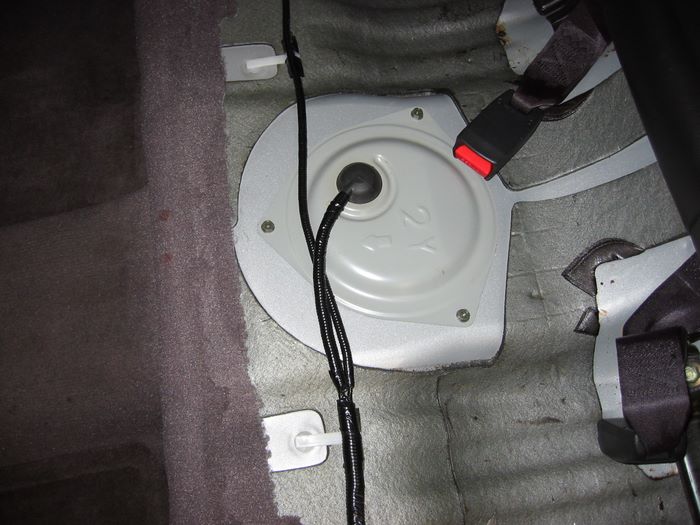
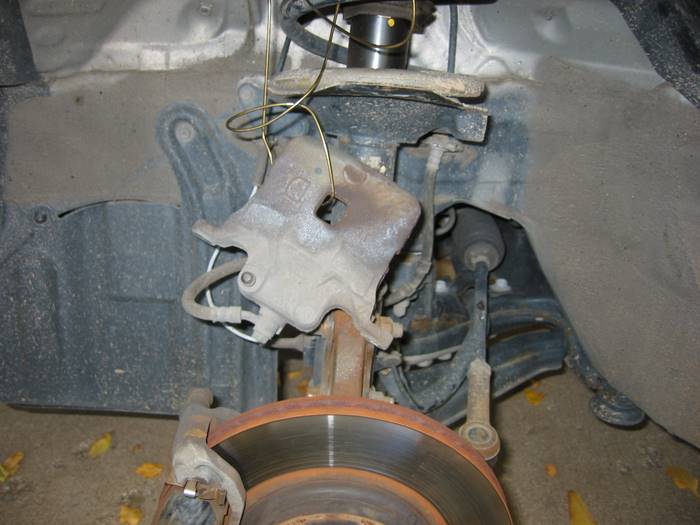
Remove the back seat by pulling toward the front of the car on two clips that are under the front of the back seat. They are visible in the pic below.

|
| |
|
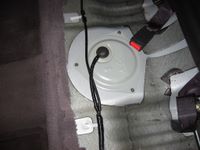
| 4. |
Remove 3 nuts using 10mm socket or phillips screwdriver. After removing the metal cover, release the clip on the wide gray plug so the cover can be set aside.
|
| |
|
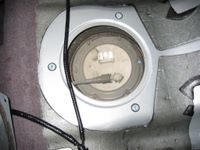
| 5. |
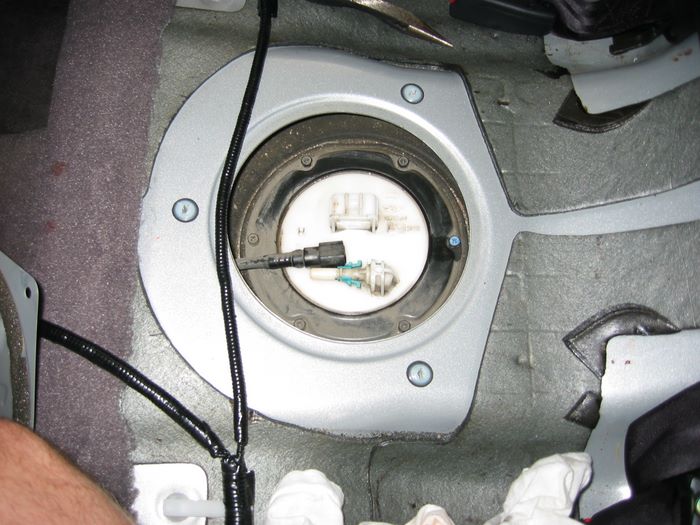
Remove fuel line by squeezing on the blue clips with needle nose pliers and slowly pulling the hose away from the housing. Keep towel handy to soak up any fuel that leaks out. Be forewarned that some fuel may squirt out when the hose is removed since there may still be some pressure in the line.
Fuel hose removed:
|
| |
|
| 6. |
Remove 6 screws with 8mm socket or screwdriver.

|
| |
|
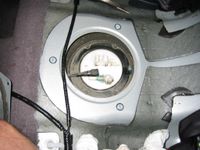
| 7. |
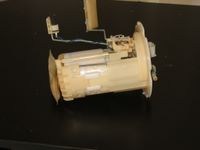
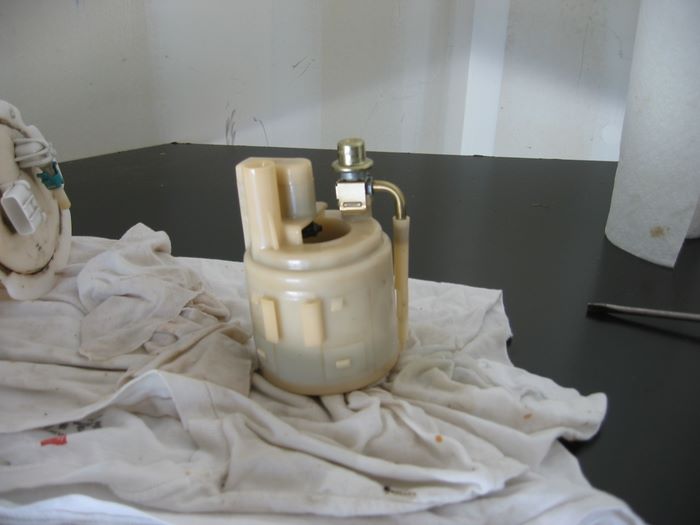
Remove the fuel filter assembly by pulling straight up at first and then tilting sideways. Note the floater arm assembly hanging off the passenger side of the assembly. You'll need to tilt the assembly toward the passenger side once the unit is about halfway out of the tank so the floater arm assembly can be navigated out of the tank.
Remove the assembly from the car and sit it on a few old towels to soak up any fuel that leaks out. You might consider sitting the whole assembly in a large pan or bowl for the next few steps since a lot of fuel will leak out.

|
| |
|
| 8. |
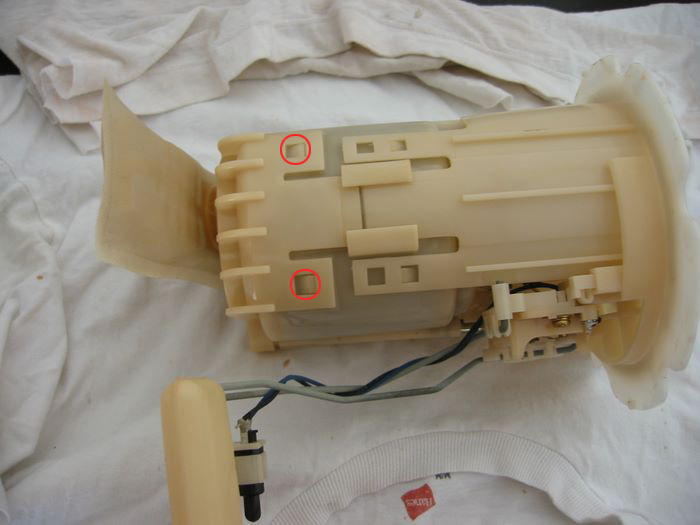
Before starting this step, I recommend pouring all the fuel you can out of the filter into a container by turning it upside down. You'll need to turn it right side up and let it sit for a few seconds, then turn it over. Repeat this process until fuel stop flowing out. This will greatly cut down on the mess.
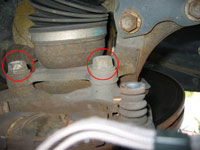
Use a small flathead screwdriver or 4 nails to release the tabs in red. These are on both sides of the assembly so only two are circled in the first photo. Insert the screwdriver as shown in photo 2 and lightly twist until the tab is released. It's tricky to get all 4 released at once so I recommend using nails under each tab to assure they remain disengaged. Be gentle to assure you don't break a tab.


I recommend using 4 nails to release the tabs. Just press the nail in toward the top of the tab until it lifts the tab up enough to release it. This is the easist way to release all 4 tabs at once since they tend to slide back on without something wedged behind them.
|
| |
|
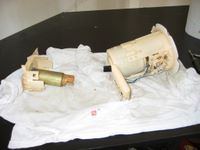
| 9. |
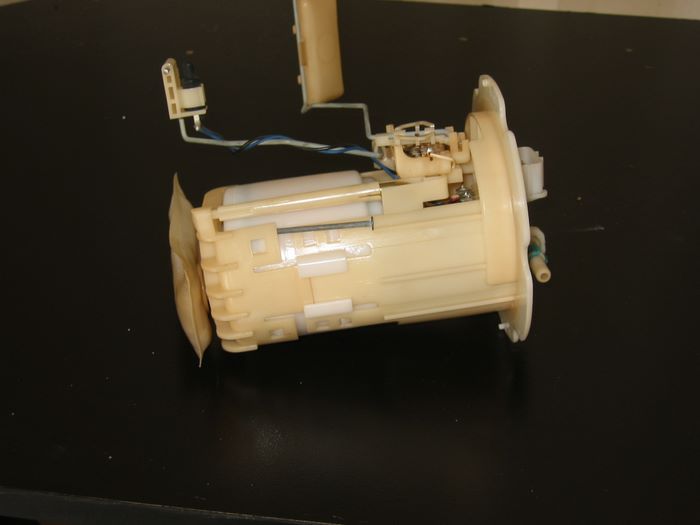
After releasing all 4 tabs, pull down slowly until the bottom of the unit separates from the assembly. Be careful not to pull too hard because you will need to disconnect a single plug that connects the two pieces.
The two pieces separated:
 |
| |
|
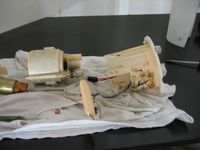
| 10. |
Using the same technique as above, remove the other 4 tabs on the fuel filter assembly.
The two pieces separated:
 |
| |
|
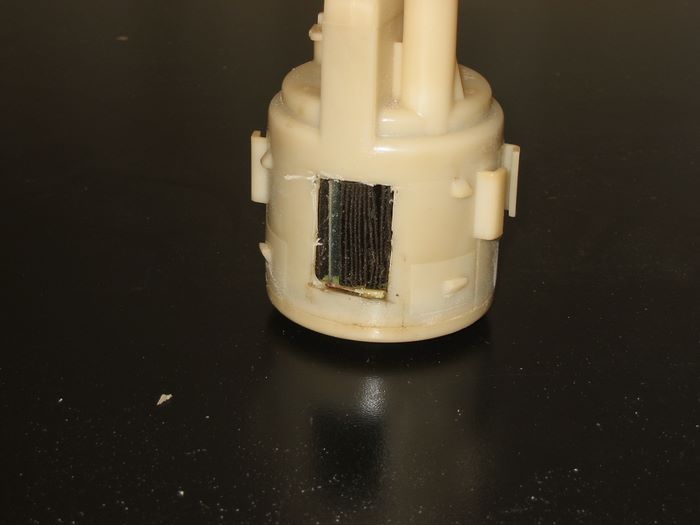
| 11. |
This is what we've been hunting for, the fuel filter itself. Remove the gold retainer clip by prying the tabs away and sliding it off the metal post toward the plastic "towers" on the housing.

|
| |
|
| 12. |
Finally there. Open the new filter and begin reassembly in reverse order using the new filter. When reassembly is complete the car takes a few seconds to start, so don't be alarmed. You may also notice some stumbling for the first minute or two. Pressure just needs to be regained in the gas line.
Some have reported improved throttle response after changing the fuel filter and many have found the filter to be very black after as little as 30k miles. I found my car now idles smoother and (though this my be in my head) the engine seems to run smoother overall. Assuming my mind isn't playing tricks on me, I would attribute this to improved fuel flow through the new filter.
|
| |
|
| 13. |
Install new seal. This seal must be replaced each time the filter is changed. Reinstall filter.
. Some have reported improved throttle response after changing the fuel filter and many have found the filter to be very black after as little as 30k miles. I found my car now idles smoother and (though this my be in my head) the engine seems to run smoother overall. Assuming my mind isn't playing tricks on me, I would attribute this to improved fuel flow through the new filter. |
|
|
|
|
| |
Copyright
© 2003-2009. All rights reserved.
Instructions are for entertainment purposes only. Perform at your
own risk.
This site is in no way affiliated with Nissan North America, Inc.
Nissan, the Nissan Brand Symbol, "SHIFT_" tagline, and
Nissan Model Names are trademarks of Nissan North America, Inc.
|
|


