| 1. |
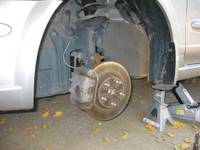
Place car on level ground. This is very important since you're removing the brakes! Chuck the rear wheels and pull parking brake while doing the front wheels. Jack up the front of the car using the jack point outlined in the manual.
|
| |
|
| 2. |
Remove wheel using lug wrench
|
| |
|
| 3. |
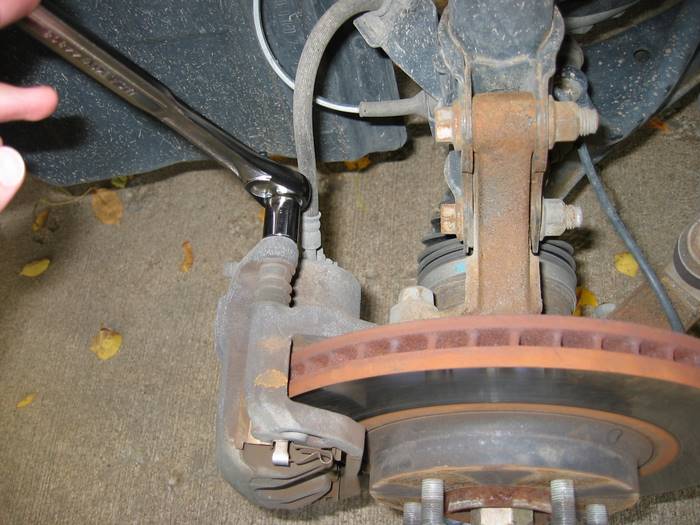
Remove the 3 17mm bolts that attach the caliper. There are two on top and one toward the bottom of the caliper bracket.
NOTE: Do NOT remove the bolt that connects the brake line to the caliper. This will introduce air into the brake system and you will have to bleed the brakes to get the air out. The brakes will be very spongy until this is resolved.
So keep the brake line connected and hang the caliper to avoid strain on the line as described in the next step.
Removing the top brake caliper bolt:
|
| |
|
| 4. |
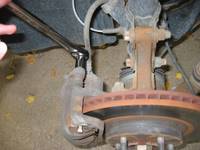
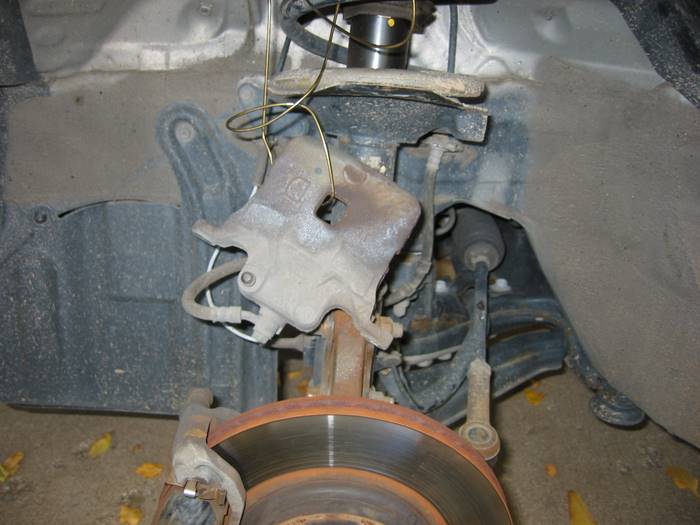
The caliper should easily slide right off the rotor after removing the above 3 bolts. Hang the caliper with an old coat hanger from the top of the spring. Never let the caliper hang from the brake line - it can damage the brake line and cause a leak.
Caliper hanging from hanger:
 |
| |
|
| 5. |
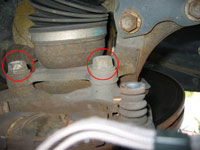
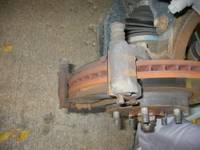
Remove the two 19mm bolts on the back of the caliper mounting bracket.
Two bolts circled in red:
 |
| |
|
| 6. |
NOTE: This step and any steps below relating to the rotor, only apply if you're replacing the rotors as well. If the brake pedal pulsates when you press on the brake, you might consider replacing the rotors as well. This is typically noticable when braking harder at faster speeds such as when exiting the highway on an offramp.
Remove the rotor. Depending on the age of the vehicle and
climate, the rotor may be rusted on. My Maxima was only 3
years old and my rotor was rusted on tight. To remove a rusted
rotor there are a number of options:
- Apply a liberal amount of WD-40 to back of the rotor and inside the lug holes on the front. Allow to soak. After a few minutes of soaking, use a large hammer and strike the back of the rotor in various locations to help dislodge it. If you are removing the rotor so it can be machined at a shop, be sure to use a piece of old scrap wood so you don't damage the back of the rotor by striking it directly with a hammer. I started with a rubber mallet but eventually had to use a large steel hammer to knock my rotor loose.
- Alternatively, you can use the holes on the caliper mounting bracket to help push the rotor off. This requires a 4" long, 1/2" wide bolt with a matching washer and nut. For some great shots of this technique, see Nathan's Cardomain site.
|
| |
|
| 7. |
Open brake fluid reservoir and wrap an old rag around it to catch any spill. |
| |
|
| 8. |
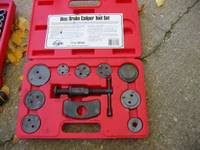
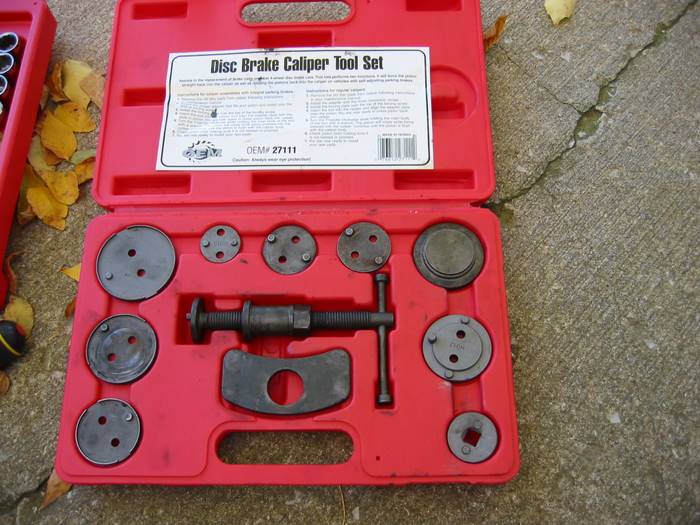
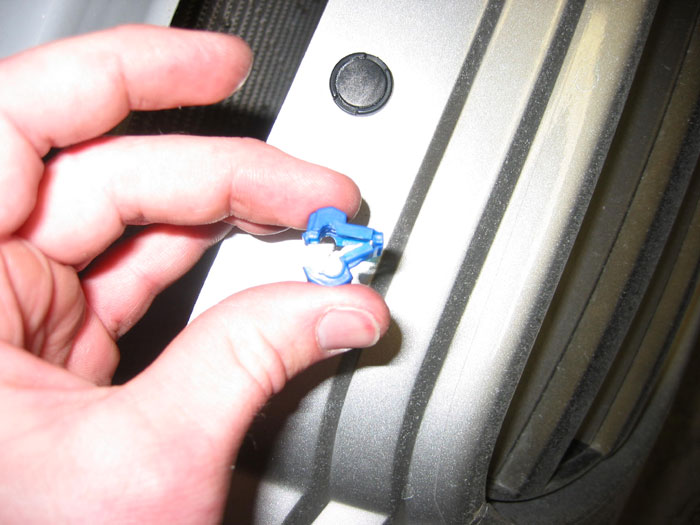
Compress the caliper pistion using a C-clamp or Caliper piston compressor tool. The C-clamp method only works on the front brakes since the rear piston must be twisted as it is compressed (the piston caliper tool naturally does this). While there are a variety of piston compressor tools, the general premise is to place the flat metal plate inside the caliper and twist the bolt until the strike plate (which rests against the piston) presses the piston back into the caliper. See the picture below. If you choose to use a C-clamp, place the old pad against the caliper piston so the c-clamp doesn't press directly against the piston and mar the metal.
NOTE: As you compress the piston, the brake fluid level will rise. Keep an eye on the brake fluid level and siphon out any extra fluid or cleanup any spill that occurs. I recommend siphoning out some of the fluid since brake fluid is hard on paint.
Brake caliper compression tool kit:
|
| |
|
| 9. |
Note the orientation of the pads. It's also good idea to do one wheel at a time so you can always reference the other wheel if you have any question on how to orient the pads on reinstall.
Only one of the two bolts that need removed are visible here:
 |
| |
|
| 10. |
Remove the two 19mm caliper mounting bracket bolts (the cradle that holds the pads). |
| |
|
| 11. |
If the old rotor was stuck, use a wire brush to clean the hub face. Optionally, you can apply a small amount of grease to the hub face to keep the new rotor from sticking sometime down the road. |
| |
|
| 12. |
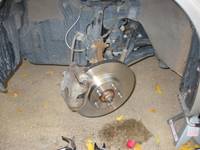
Before installing the new rotor, it's important to clean it off with rubbing alcohol and brake cleaner or rubbing alcohol. Rotors are shipped from the factory with a protective coating to keep them from rusting before sale. Use a liberal amount of brake cleaner and give it a good scrub until it no longer feels like it has a film on it. Once clean, install the new rotor by sliding it over the lugs.
New rotor installed:
 |
| |
|
| 13. |
Remove the old brake pads from the caliper mounting bracket and clean the shims and hardware thoroughly with brake cleanup. Use a clean rag to scrub off deposits. Make sure this hardware is smooth and clean. The pads slide back and forth in this hardware so it's important to make sure the path is smooth as possible. Once clean, dry them off. |
| |
|
| 14. |
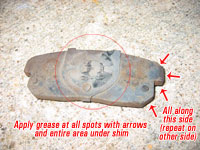
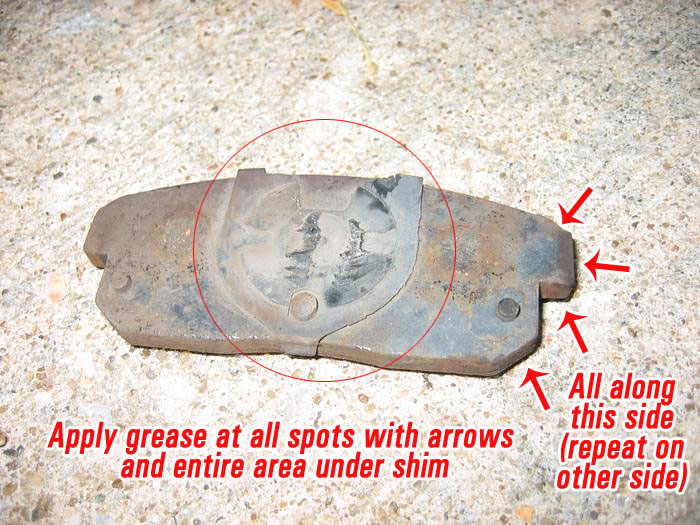
Apply grease to all the touch points in the channel where the pads sit. Apply a liberal amount of grease on the back of the brake pads and reinstall the shims. Apply grease to the points on the caliper mounting hardware where the pad will sit.
Apply grease to the following points on the brake pad. This is the back pad so the shim is smaller. Apply a liberal amount of grease to the back of the pad wherever the shim and the pad meet.
|
| |
|
| 15. |
Reinstall caliper mounting bracket and torque bolts to 53-72 ft. lbs. Insert pads back into caliper mounting bracket and slide caliper over the pads. |
| |
|
| 16. |
Reattach caliper to caliper mounting bracket and tighten caliper mounting bolts to 16-23 ft lbs.
Completed job:
|
| |
|
| 17. |
Check brake fluid level. Add fluid from a brand new bottle of brake fluid as needed. It's important not to use brake fluid that has already been opened because brake fluid soaks up moisture overtime reducing its effectiveness. |
| |
|
| 18. |
Reinstall wheel, remove wheel chucks, and lower car. |
| |
|
| 19. |
IMPORTANT: You must bed the brake pads after installation. This is very important to help avoid squeaking down the road. The specifc bedding procedure is typically provided with the brake pads, but the general rule is to drive around 45 and brake hard, releasing the brake right before coming to a stop. Repeat this process 4 or 5 times. |
| |
|
| 20. |
While not required, it's a good idea to bleed the brakes after doing a brake job. |
| |
|
| 21. |
The pictures above are for the front brakes, but doing the back is just the same with a couple minor differences:
- Remove the 14mm bolt holding the mount for the emergency brake cable to get the upper part of the caliper off.
- The lower piece of caliper has 17mm bolts.
- The piston must be turned clockwise to be compressed. Make sure the end of the caliper compressor is inserted properly into the grooves in the piston so the tool actually twists the piston as it compresses.
- Hook the emergency brake cable back onto the spring mechanism before reinstalling the upper caliper piece. It's hard to hook up after the caliper is assembled.
- To get the rear caliper back over the rotor, you must turn the cylinder so the nub lines up with the groove it slides into.
|
Edit: Here's a few more notes submitted from reader ajahearn:
- Some vented rotors are directional so people need to pay attention to the one to install.
- Slotted/drilled/dimpled/etc rotors are supposed to be non-directional but some manufacturers want you to install them such that the first dimple/part of the slot/etc that reaches the pad needs to be at the top with the idea that any grabbing will pull the pads inward toward the hub and not force them upward away from the hub.
- The caliper should never be left hanging from the brake line - it should always be supported by a hanger or bungy cord
- For the rear piston, the boot may start to bind and make it harder to compress/rotate. To resolve, occasionally back off (counter clockwise) to get the boot to straighten and then start again. And opening the bleed valve makes it considerably easier to turn the piston back in. Of course you need to have a hose to prevent the fluid from spraying
|


