While not required, I recommend asking a buddy to help. It will
really cut down on the install time - particularly when compressing
the springs.
| Front Wheels |
|
|
| |
|
|
|
| 1. |
Raise both sides of the front of the vehicle using
jack and jack stands or hydraulic lift. NOTE: Struts
can't be removed with only one side raised. |
|
|
| |
|
|
|
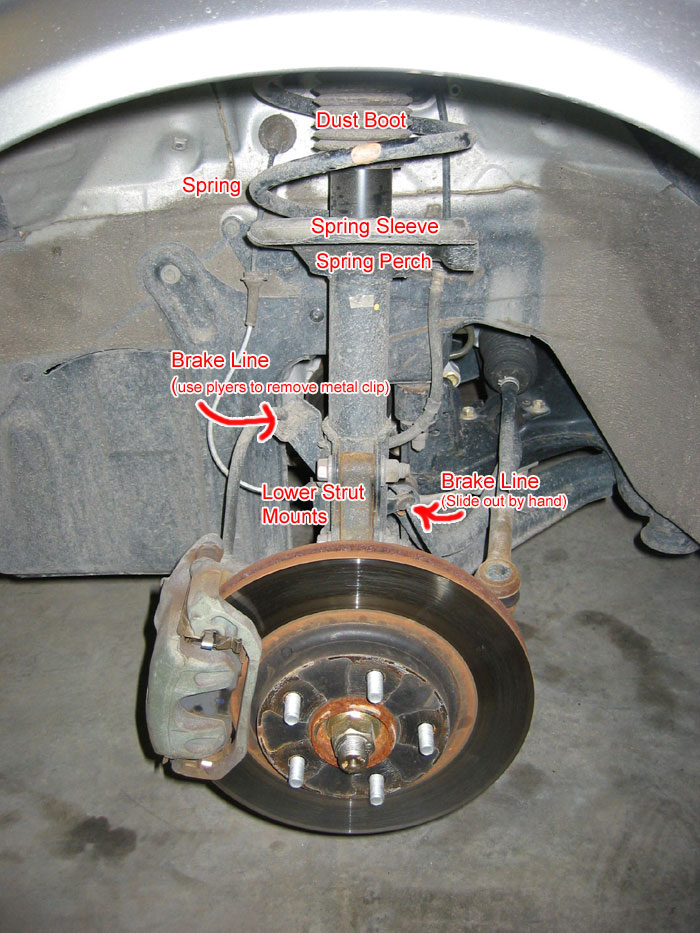
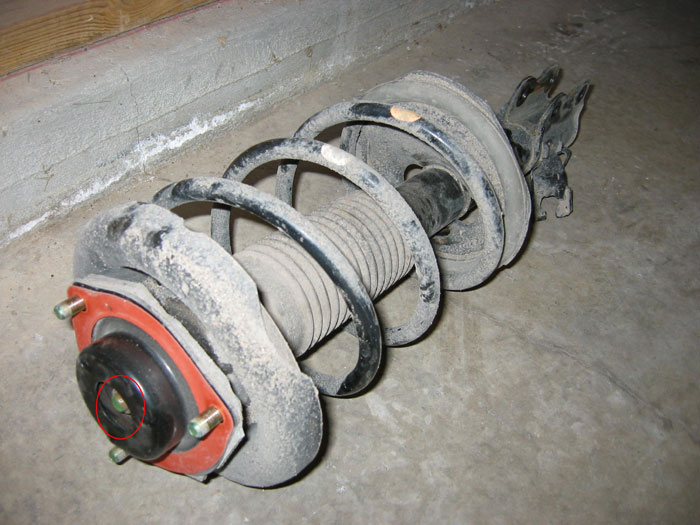
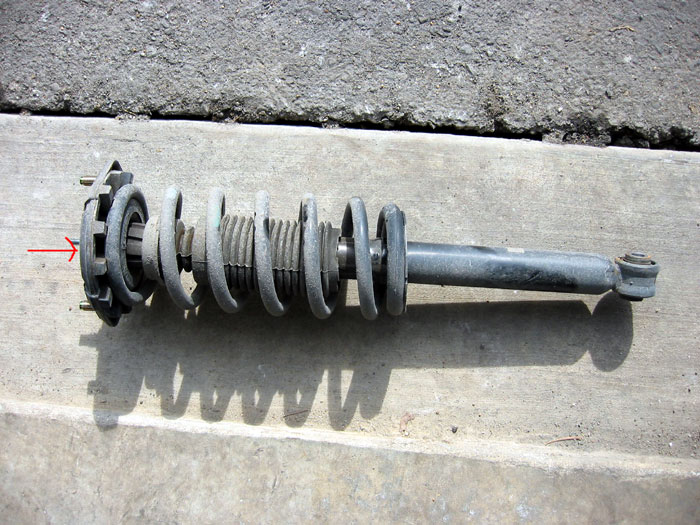
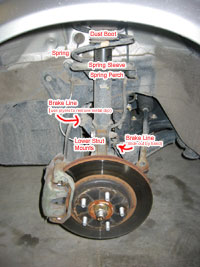
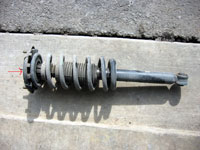
| 2. |
Remove wheel with lug wrench. Once the wheel
is removed, you'll see the strut assembly:
Note - The part labeled "Spring Sleeve" is also
known as the spring isolator
|
|
|
| |
|
|
|
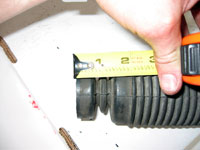
| 3. |
Remove the three bolts around the center bolt.
Loosen BUT DO NOT REMOVE center nut at top
of strut. |
|
 |
| |
|
|
|
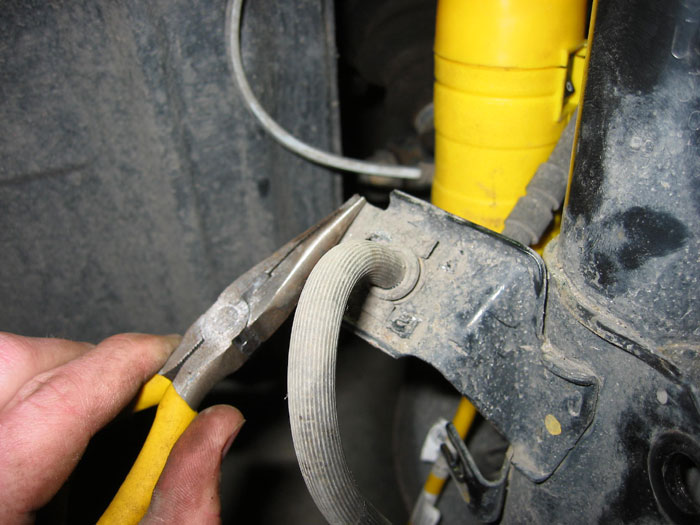
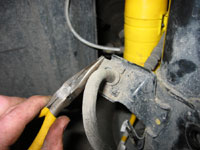
| 4. |
Remove the brake line attachments on the struts.
Slide the retainer clip on the left out with pliars The other
break line attachment can be slid out by hand. |
|
 |
| |
|
|
|
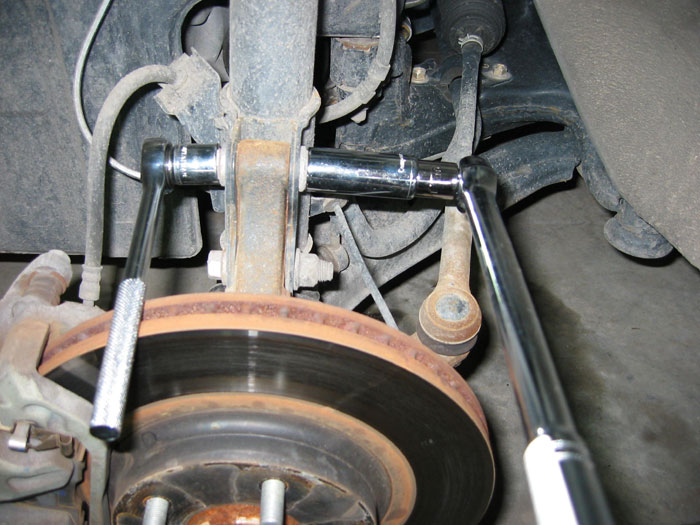
| 5. |
Use 17mm & 19mm socket wrenches to remove
the two large bolts mounting the strut to the trailing arm.
This requires two sockets or wrenches since the bolt on the
opposite side will just spin otherwise. The strut will fall
when these bolts are removed so be sure to catch it.
NOTE: There is a CV boot underneath the
strut where the strut will naturally hit when it's removed.
Be sure to catch the strut when the bolts are removed to avoid
damage to the CV boot below. If you really want to be safe,
you can wrap your CV boot in a towel to protect it - just
don't forget to remove it when you're done! |
|


|
| |
|
|
|
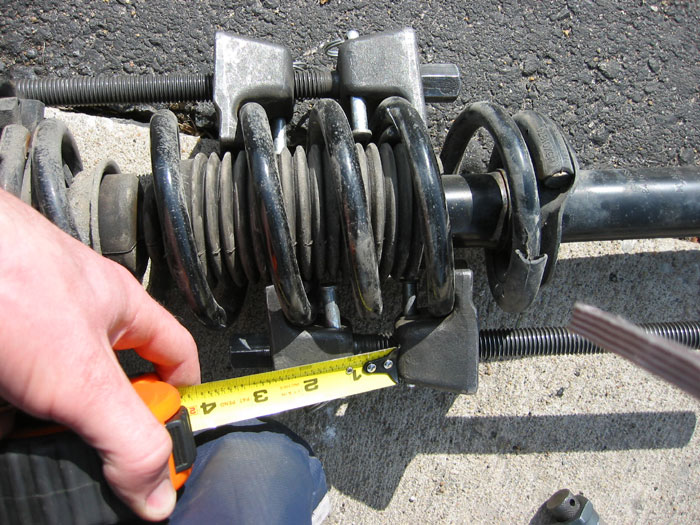
| 6. |
With the strut now off of the car, compress
the stock spring. Make sure to compress both sides evenly
- Don't tighten down one side and then move to the other.
WARNING: Compressed springs can kill. Always
point the top of the strut away from you and other people
and make sure spring compressor is securely fastened. Take
turns slowly tightening each side until the spring is compressed
enough to take the pressure off the top hat.
A few tips:
- A wrench may be necessary if clearance for the socket
is an issue. Or, if you have a second wrench or socket,
tightening the compressor on the other side and it should
loosen up the socket that's stuck.
- Try to position the compressor as close to the bottom
of the spring as possible with the bolts on the compressor
facing down toward the perch to avoid clearance issues with
the nut on the compressor.
- Don't flip the compressors around where the bolts point
toward the bottom of the spring perch - then you'll have
problems positioning the top hat properly since the long
bolts on the compressor will get in the way. (Yes, the picture
at the right shows the spring compressor oriented the wrong
way, but do as I say, not as I do!)
- Be sure to skip a coil when installing the spring compressor.
Otherwise you'll have difficulties getting the spring compressed
enough. (again, not depicted in the image at the right,
but I learned.)
Compressing and uncompressing the springs is a slow process.
To speed things up I recommend using an impact wrench or high
power drill with a socket bit and socket, u-joint and extension
so the spring compressor can be tightened quickly. |
|
|
| |
|
|
|
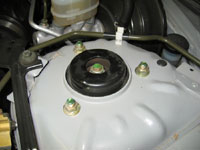
| 7. |
When spring is compressed, carefully remove
top hat bolt. The top hat bolt is circled in red in image
at right, but the spring compressor isn't installed in this
shot.
NOTE: The spring must be compressed sufficiently
with a spring compressor before you remove the top hat bolt.
There may still be some pressure on the spring, causing the
top hat to pop off. Be sure to point the top hat away from
you! |
|

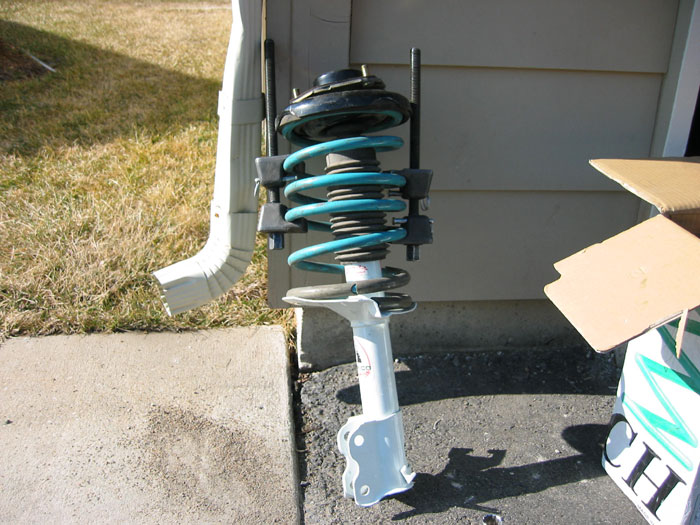
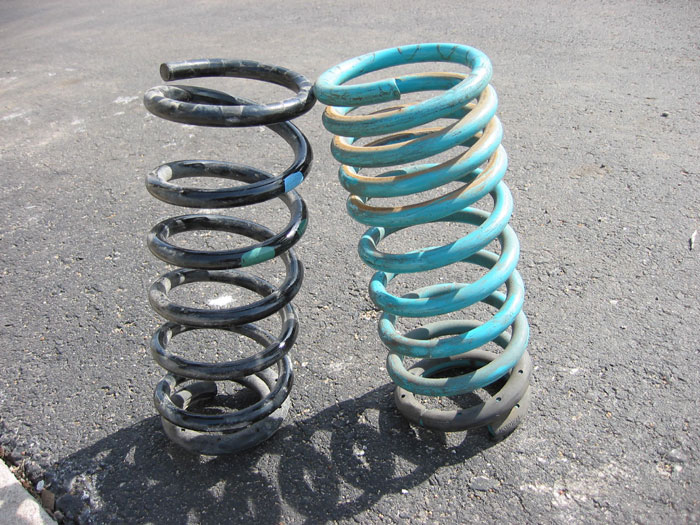
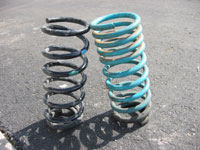
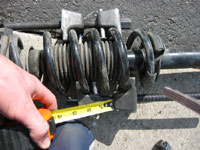
Comparison of OEM front spring and Progress front Spring (on
right):
|
| |
|
|
|
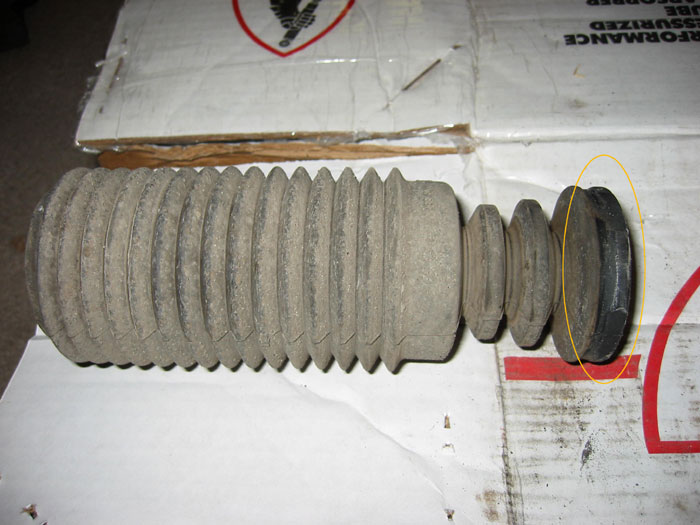
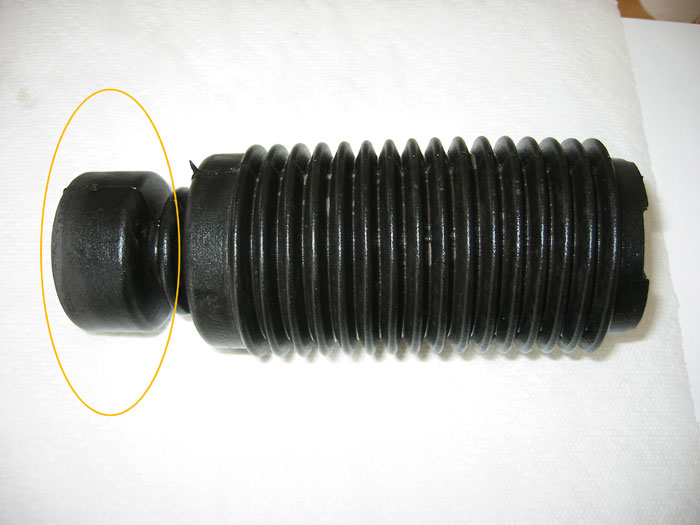
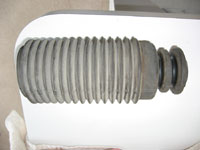
| 8. |
OPTIONAL: Trim bump stop
with razor blade or box cutters. The bump stop is connected
to the dust boot and is circled in orange at the right. Tokico
recommends trimming no more than 1/3 - 1/2 the length of the
bump stop.
UPDATE: It appears the two rings below the
orange circle are considered to be part of the bump stop as
well. If anyone can confirm this, please let
me know. Nonetheless, I trimmed the part circled in orange
off. When I first installed my struts and springs I didn't
trim the bump stops at all and I had problems with the front
bottoming out on larger bumps. Since I trimmed, this very
rarely occurs. Also, most people running more mild drops (Eibachs,
H&R, etc.) don't trim their bump stops and have no issues.
Most spring manufacturers provide detailed instructions on
how to trim the bump stops if necessary.
A poll on this topic is here.
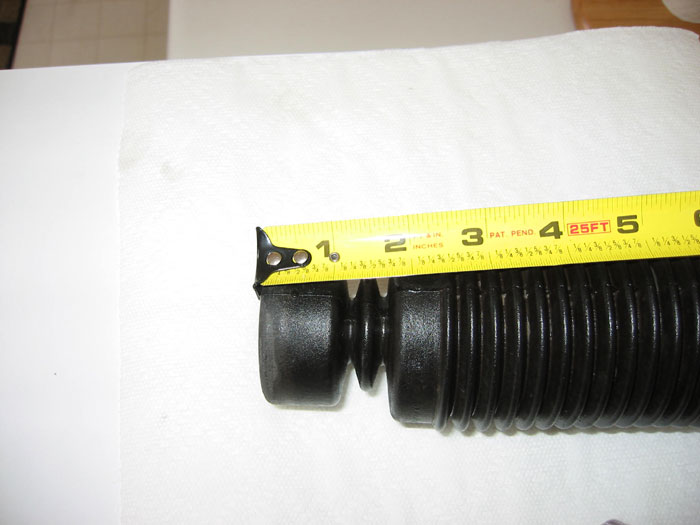
|
|

Front after trimming:
|
| |
|
|
|
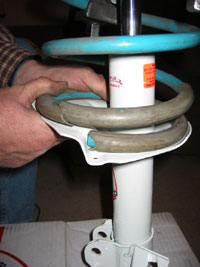
| 9. |
Compress new spring with spring compressor and
install on strut. Make sure the spring isolator (sleeve - gray
in the picture) is installed on the spring and resting on the
perch. Though not shown in this shot, the isolator should be
positioned to hang off the end of the spring about 1/4".
This will avoid rubbing noises of the spring contacting the
perch. Apply 3M rubber seal to attach the isolator to the spring
and assure the isolator doesn't slide around on the spring post
install. Also, make sure the end of the spring is resting on
the lowest part of the perch as shown at right. |
|
 |
| |
|
|
|
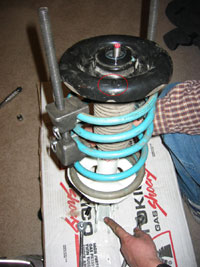
| 10. |
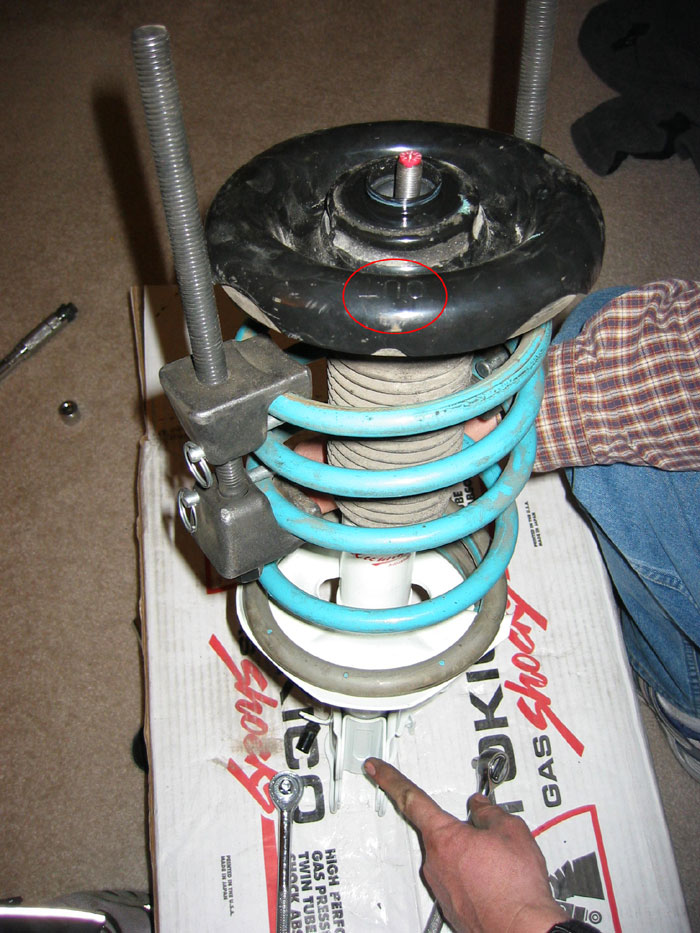
Reinstall the top hat. Make sure the "OUT"
label on top hat faces out toward the wheel well. It should
be on the same side of the strut as the mounting bolts (which
are being pointed to in the picture).. |
|
|
| |
|
|
|
| 11. |
Reinstall strut by following the removal steps
in reverse order. Use the following torque specs in newton
meters (N-m):
- strut to steering knuckle bolts 140-159 N-m
- strut upper mount nuts 39-54 N-m
- piston rod nut (nut that holds down top hat) 59-88 N-m <-NOTE:
This is for a factory strut. Follow the torque specs for whatever
aftermarket strut you're installing otherwise.
Job half done: |
|

 |
| |
|
|
| REAR WHEELS |
|
|
| 1. |
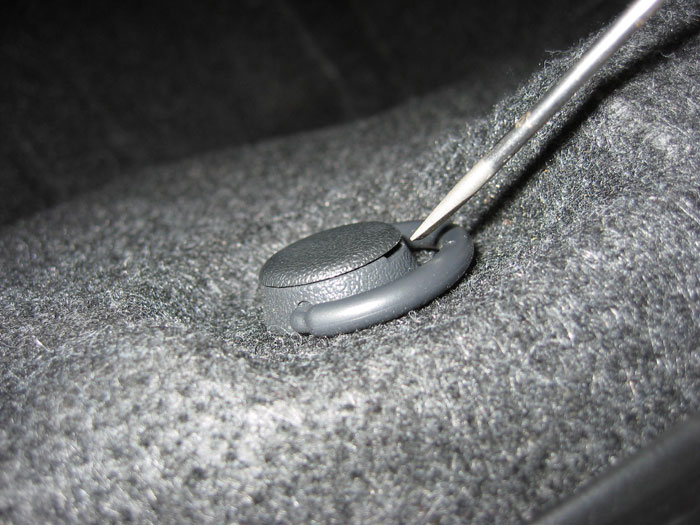
NOTE: The first step was formerly to remove the
trunk liner, but this isn't actually necessary. You merely need
to pull away the liner over the rear struts by removing the
attachments near the seat pass through.
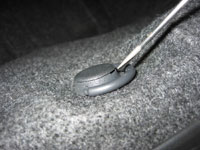
Use a flathead screwdriver to remove the pop tabs by sliding
the flathead into the slit on the side and twisting. |
|
|
| |
|
|
|
| 2. |
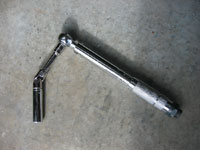
Prepare socket wrench with extension, universal
joint, and 14mm deep well socket. A longer extension can be
substituted for a deep well socket here if preferred. This combo
makes attacking the rear strut bolts really easy. |
|
 |
| |
|
|
|
| 3. |
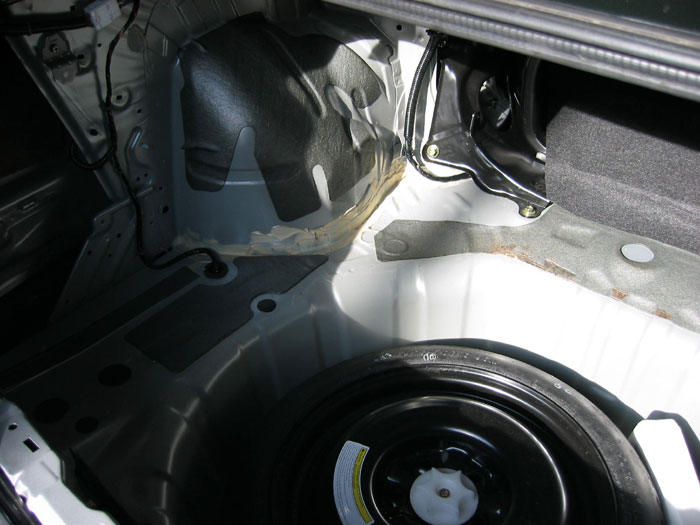
Trunk stripped (Totally optional). I removed
mine just so you can clearly see the rear strut towers, which
are all you really need access to. |
|
 |
| |
|
|
|
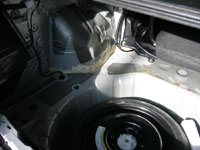
| 4. |
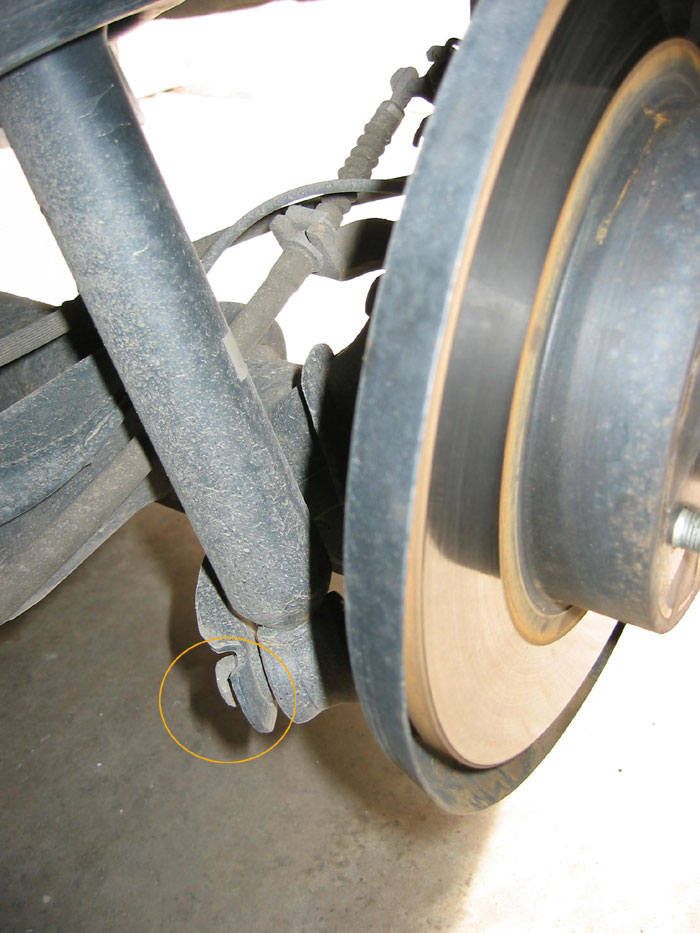
Remove the two outer bolts with the socket
setup mentioned above. The nut in the rear is hidden by the
metal shield and represented by the orange circle. Attack
the nut from above through the higher hole in the shield.
The lower strut mount will continue to support the strut after
these are removed.
IMPORTANT NOTE: When removing these nuts,
make sure not to drop them as they'll be very difficult to
retrieve behind the black metal shield. I'd recommend using
your fingers for those last few turns to assure you don't
drop the nuts. A telescopic magnetic tool would also come
in handy if you happen to have one.
|
|

 |
| |
|
|
|
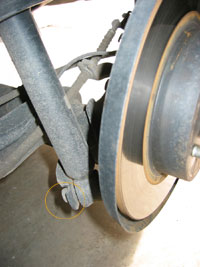
| 5. |
Remove the lower strut mount bolt with 17mm socket
and breaker bar. Soaking with PB Blaster or WD-40 in advance
may help loosen it up. The bolt is circled in orange. The strut
will fall when this bolt is removed so be sure to catch it.
|
|
 |
| |
|
|
|
| 6. |
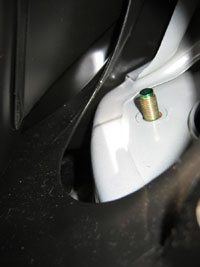
Loosen top hat nut with a 14mm deep well socket
a little but DO NOT REMOVE YET. This must be loosened before
the spring is compressed or the strut shaft will just spin when
you attempt to loosen the top hat nut. The top hat nut isn't
visible in the shot at the right, but the red arrow is pointing
to it. |
|
 |
| |
|
|
|
| 7. |
Compress factory spring with spring compressor.
WARNING: Compressed springs can kill. Always
point the top of the strut away from you and other people and
make sure spring compressor is securely fastened. Once the spring
is compressed enough to relieve the pressure on the top hat,
carefully remove the top hat bolt. |
|
 |
| |
|
|
|
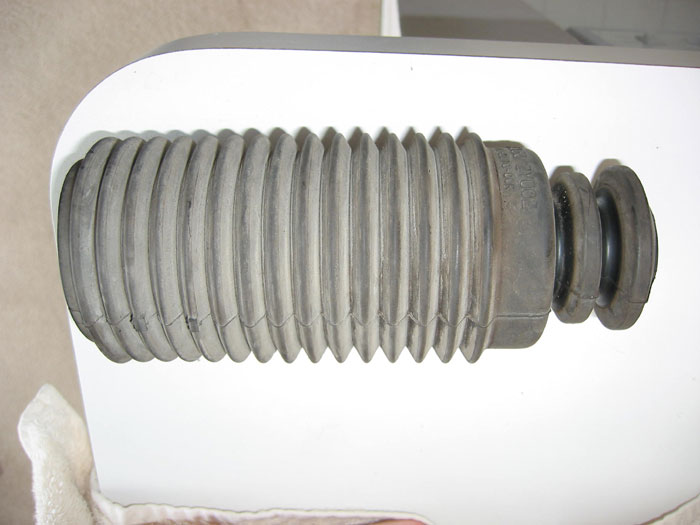
| 8. |
Disassemble strut carefully and take note
of parts and order. OPTIONAL: Trim bump stop
with razor blade or box cutters. The rear bump stop is connected
to the dust boot. Tokico recommends trimming no more than
1/3 - 1/2 the length of the bump stop. I trimmed a little
less than 1/2 of the rear bump stops. Some spring manufacturers
specify the amount the bump stop should be trimmed.
|
|
Bump stop and dust boot unit:

Before trimming:

After trimming:
|
| |
|
|
|
| 9. |
Compress new spring. |
|
|
| |
|
|
|
| 10. |
Install spring on perch. Make sure the spring
isolator (sleeve - gray in the picture) is installed on the
spring and resting on the perch. Though not shown in this shot,
the isolator should be positioned to hang off the end of the
spring about 1/4". This will avoid rubbing noises of the
spring contacting the perch. Apply 3M rubber seal to attach
the isolator to the spring and assure the isolator doesn't slide
around on the spring post install. Also make sure the end of
the spring is resting on the lowest part of the perch as shown
in the picture at the right from step #9 for the front
strut. The principle is the same. Re-assemble strut and tighten
top hat bolt to 59-88 nm <-NOTE: This is
for a factory strut. Follow the torque specs for whatever aftermarket
strut you're installing otherwise. |
|
|
| |
|
|
|
| 11. |
Re-install strut assembly on car. You may have
to recompress the spring and twist the top hat so the bolts
line up properly on reinstallation. Use the following torque
specs in newton meters (N-m):
- strut to steering knuckle bolts 140-159 N-m
- strut upper mount nuts 39-54 N-m
More pictures of the drop here. |
|
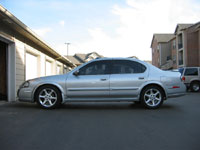
The finished product:
|
| |
|
|
|
| 12. |
If you have any noises, give this checklist
a look. |
|
|
| |
|
|
|
| 13. |
Get a four wheel alignment. |
|
|